Full onboarding guide
Walk through every step needed to get your Stealed organization production-ready: domains, keywords, team members, and your first monitor.
This guide covers everything beyond the quickstart: how to surface your full attack surface (domains, subdomains, keywords), invite team members, and set up your first end-to-end alert flow.
1. Add your domains
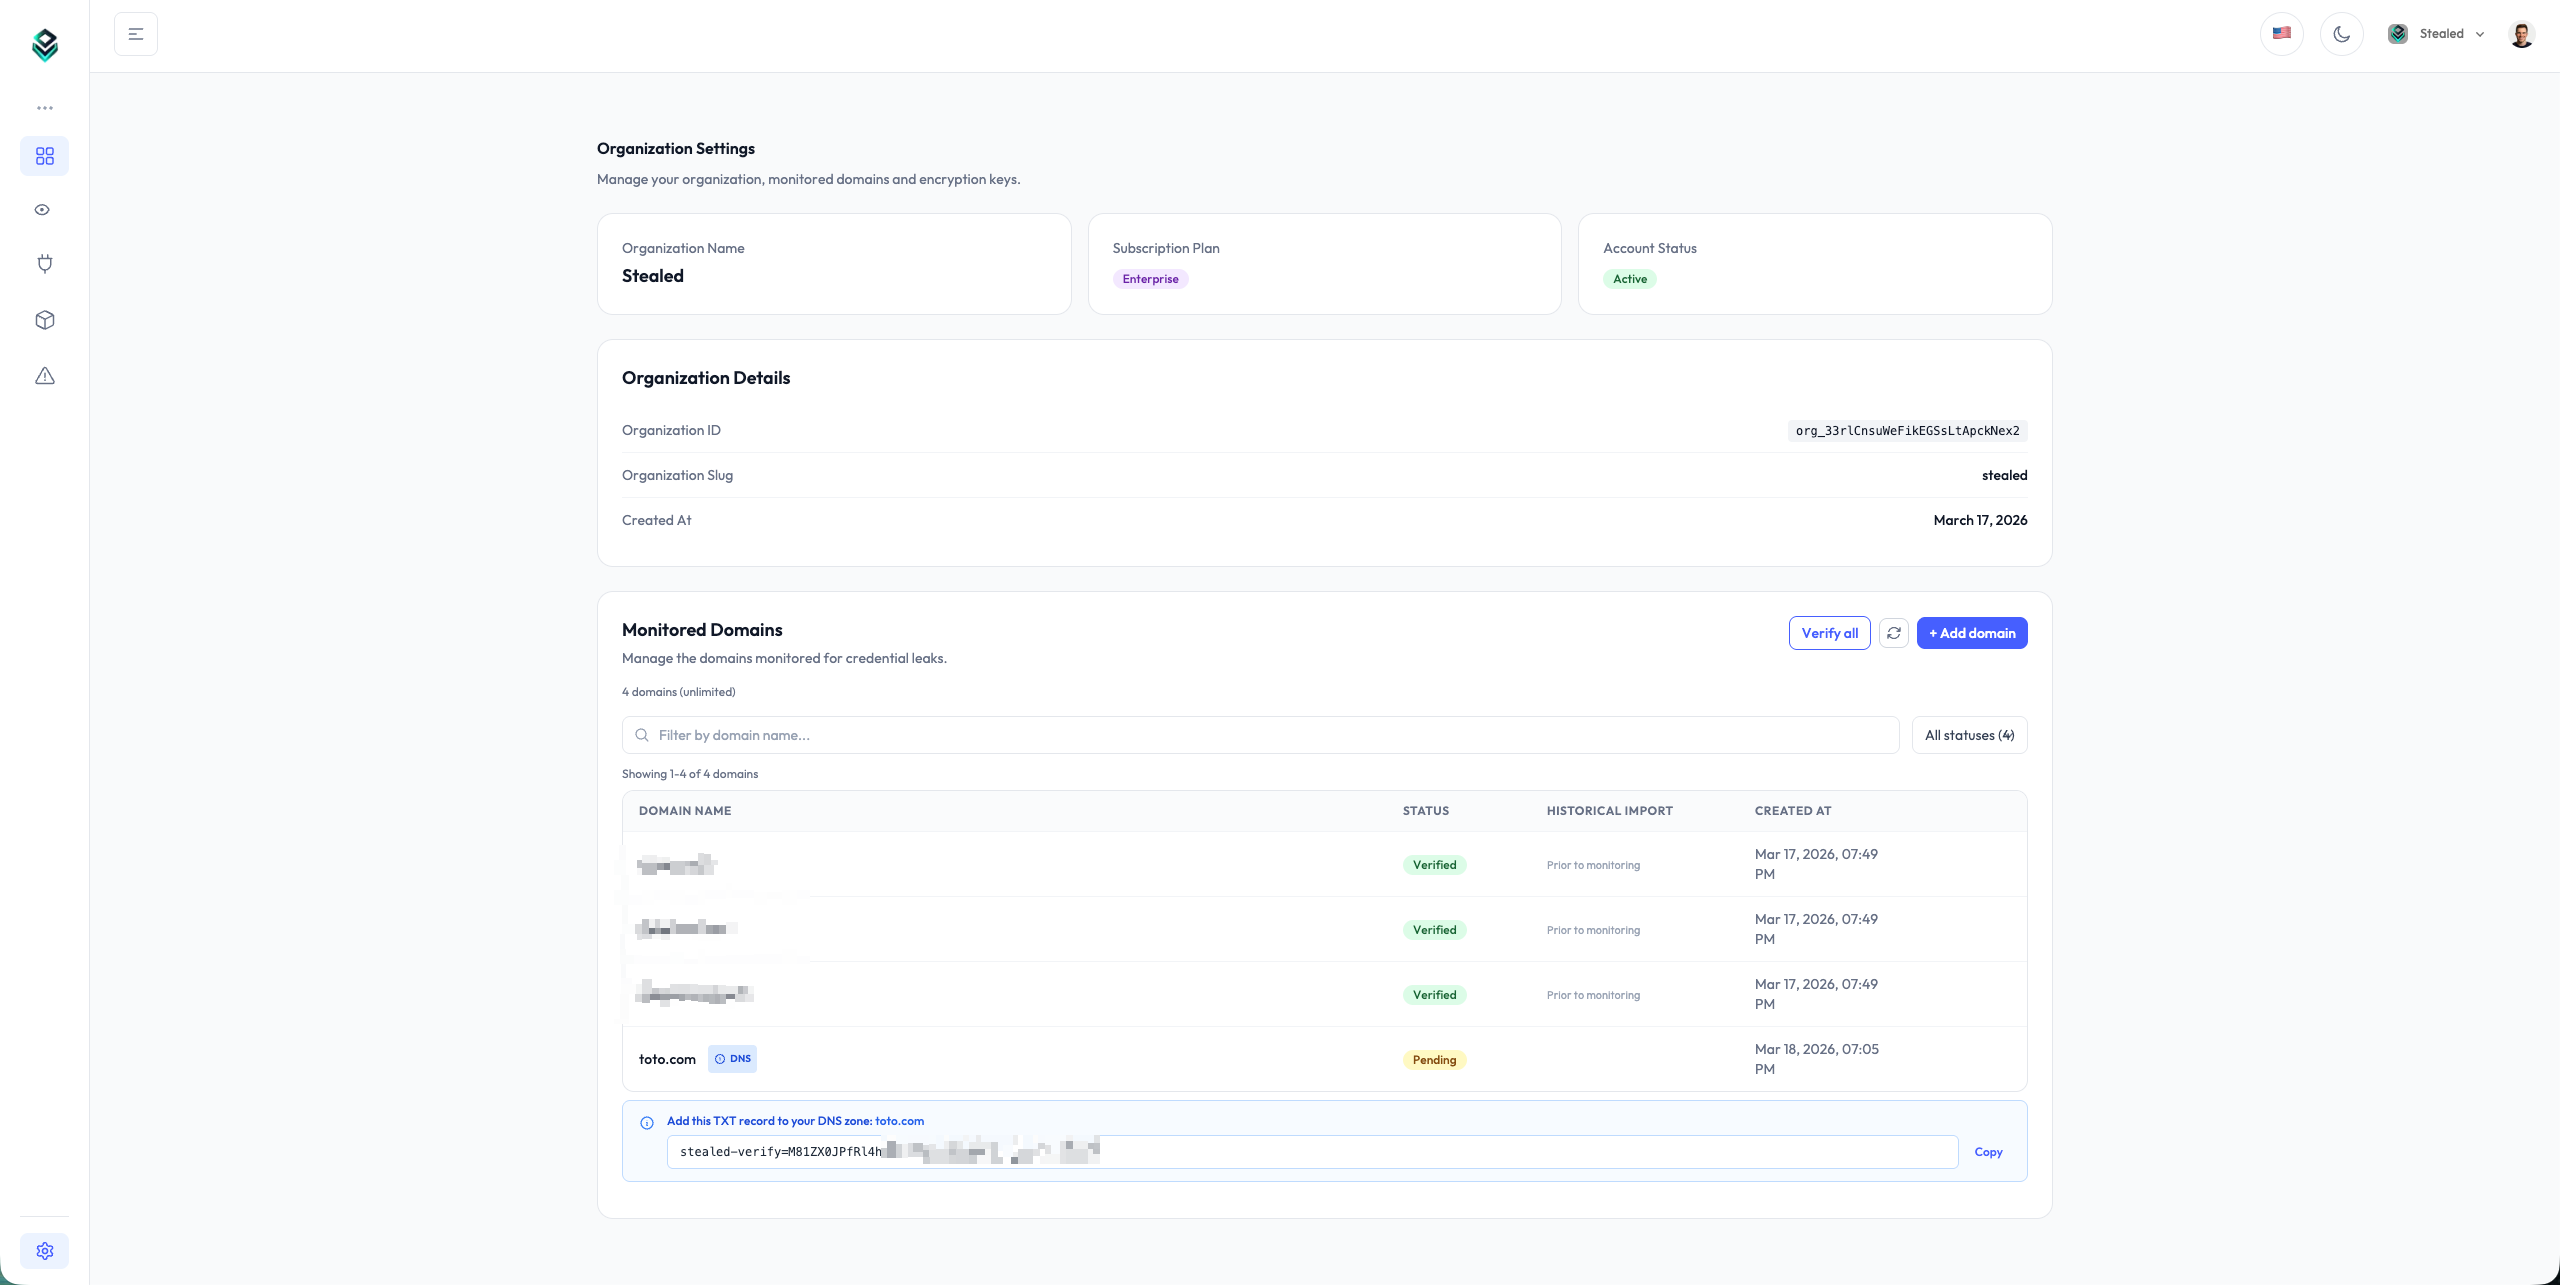
Stealed surveillance is anchored on the domains you own and operate. Open Settings → Domains and add every root domain you want to monitor.
Each root domain you add automatically covers:
- The root domain itself (e.g.
acme.com) - Every subdomain (
portal.acme.com,api.acme.com,mail.acme.com) - Variations on uppercase / lowercase
You don't need to list subdomains individually. If you have a specific subdomain that doesn't fall under a root you control (e.g. a SaaS-hosted portal), see Keyword Insight instead.
For each domain Stealed checks ownership via a DNS TXT record. The record name and value are displayed when you add the domain. Verification typically takes a few minutes, up to one hour depending on your DNS provider's TTL.
2. Add keywords (Keyword Insight)
If you want to watch for leaks targeting URLs that contain your brand or a sensitive term but aren't on your own domains, add keywords. Stealed surfaces every leak whose URL contains the keyword, even on third-party domains.
Common keywords:
- Your company name (
acme) - A product brand
- A subsidiary name
- An internal project codename
Open Settings → Keywords and add the term. Stealed highlights matches
on URLs like acme.vendor.com, portal-acme.service.io or
saas.example.com/acme.
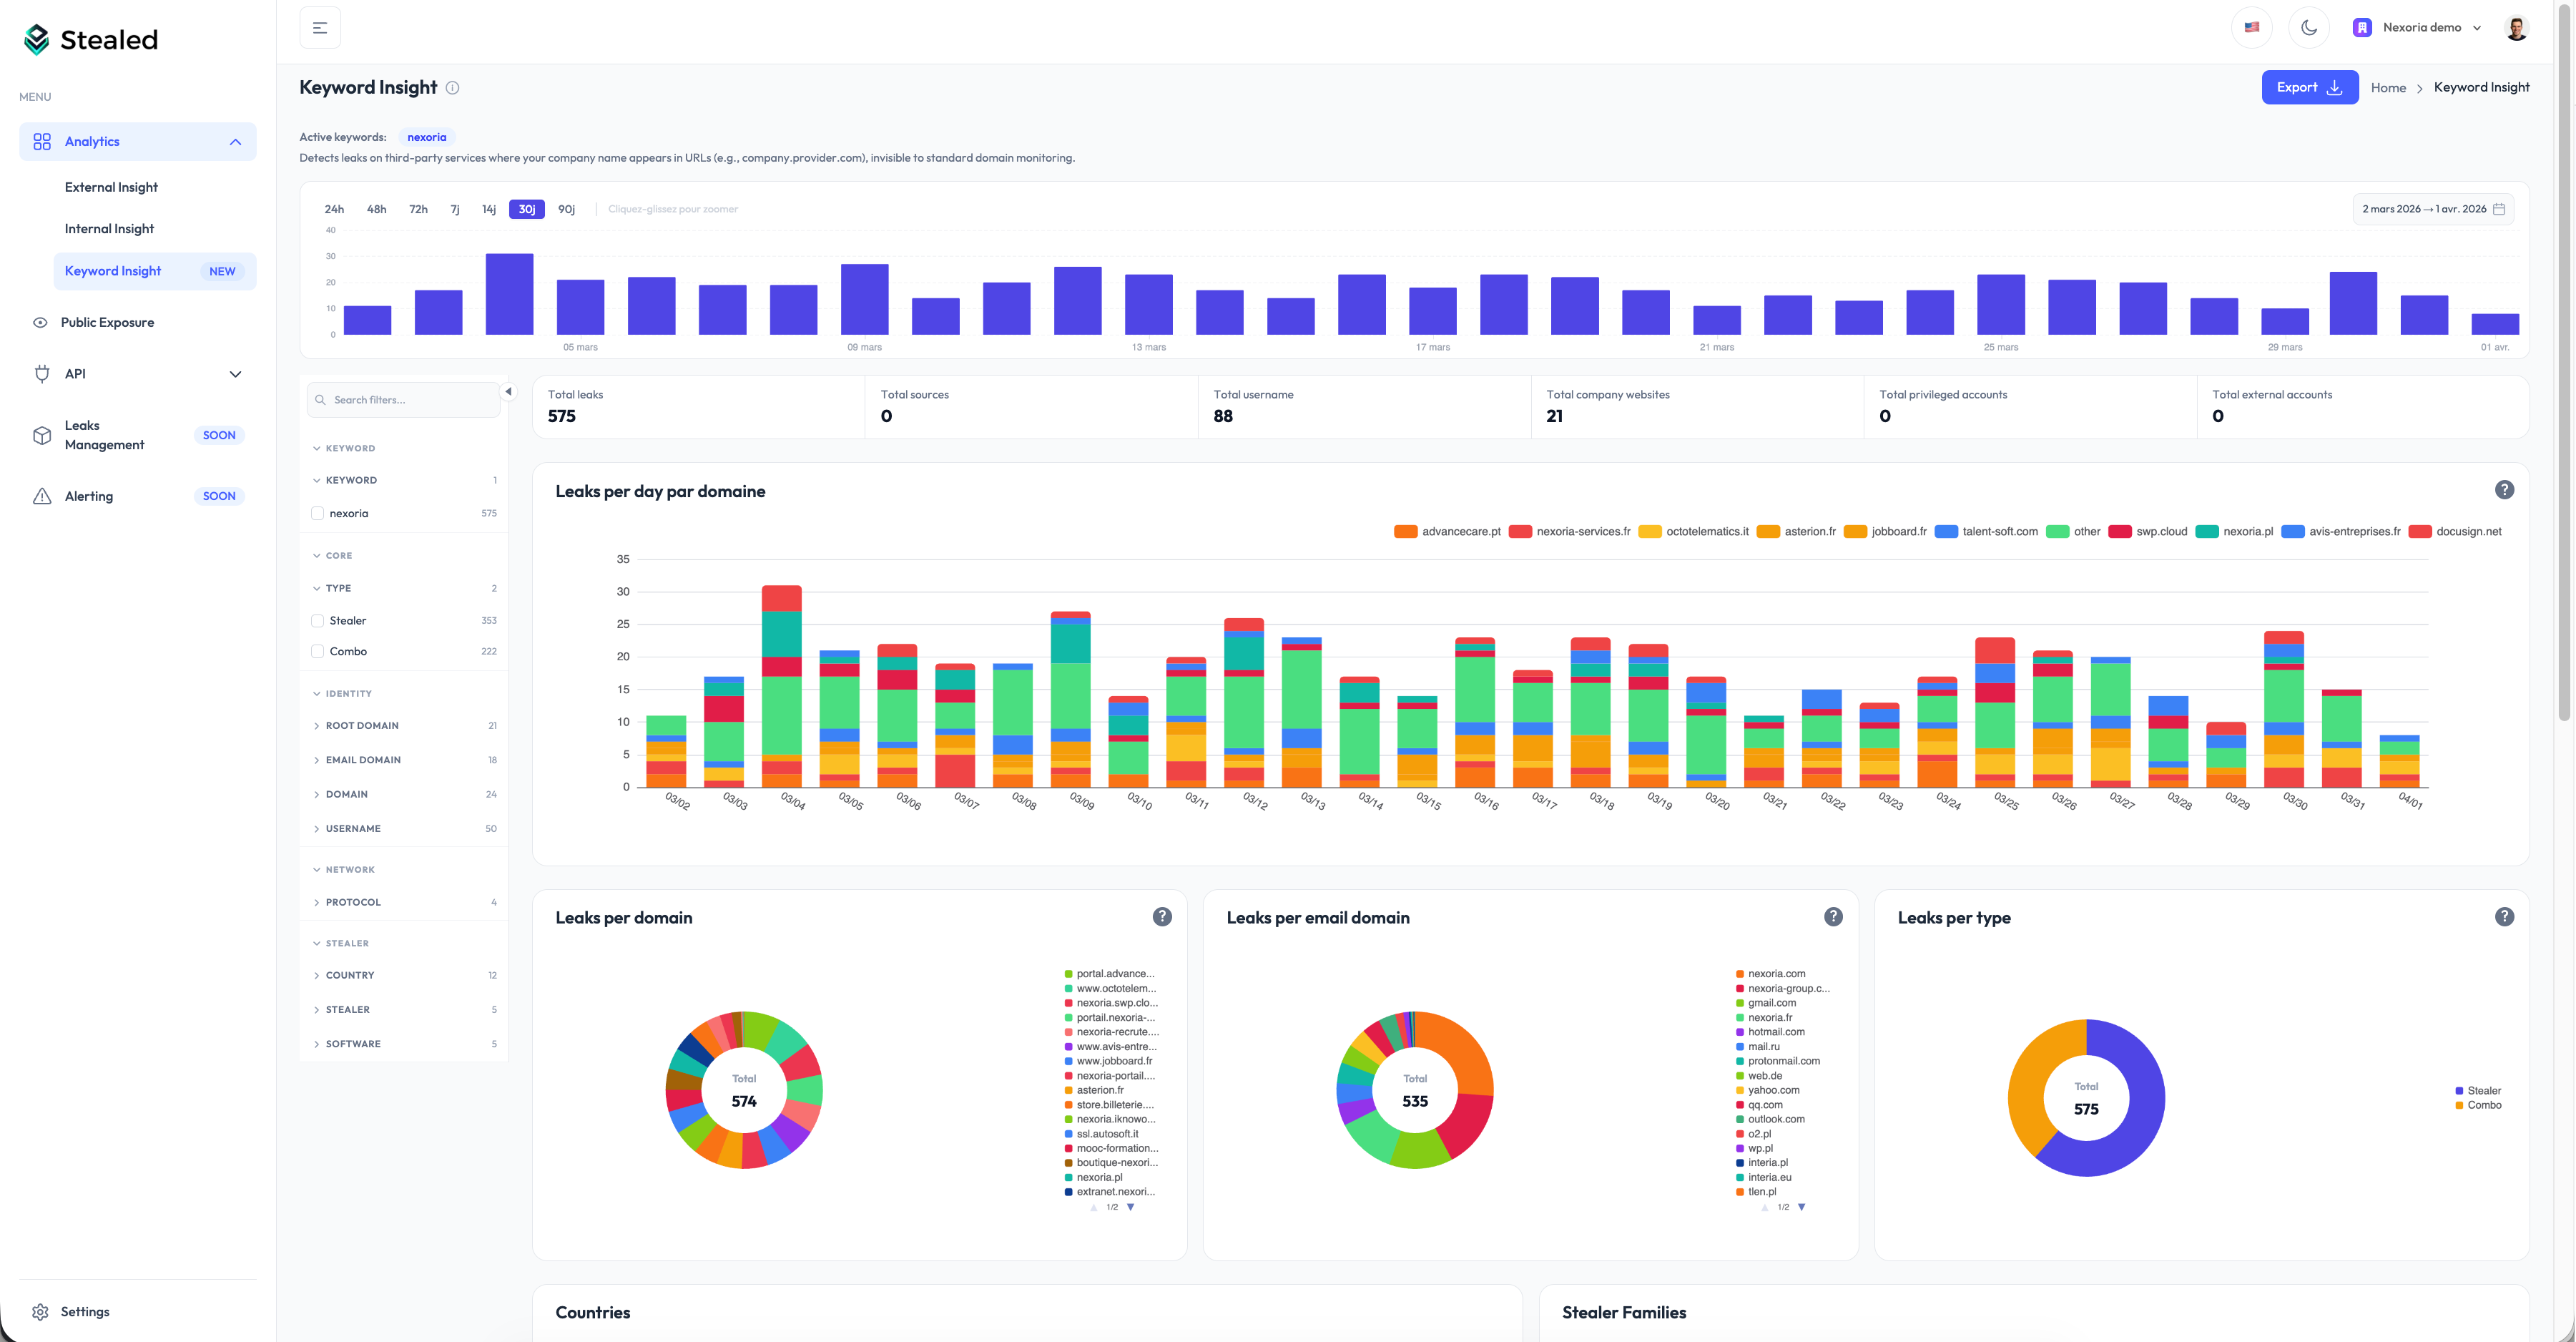
Keyword Insight is included with Enterprise plans and available as an add-on on Pro plans. Contact sales to enable it.
3. Add team members
Self-service team invitations are not yet available. To add a member to your organization, write to contact@stealed.io with the email address and the role you want them to have. We'll provision them within one business day.
Available roles:
- Owner: full administrative access, can manage billing
- Admin: manage monitors, channels, domains, keywords, API keys
- Member: read-only access to leaks, can be assigned events
The self-service invitation flow is on our short-term roadmap.
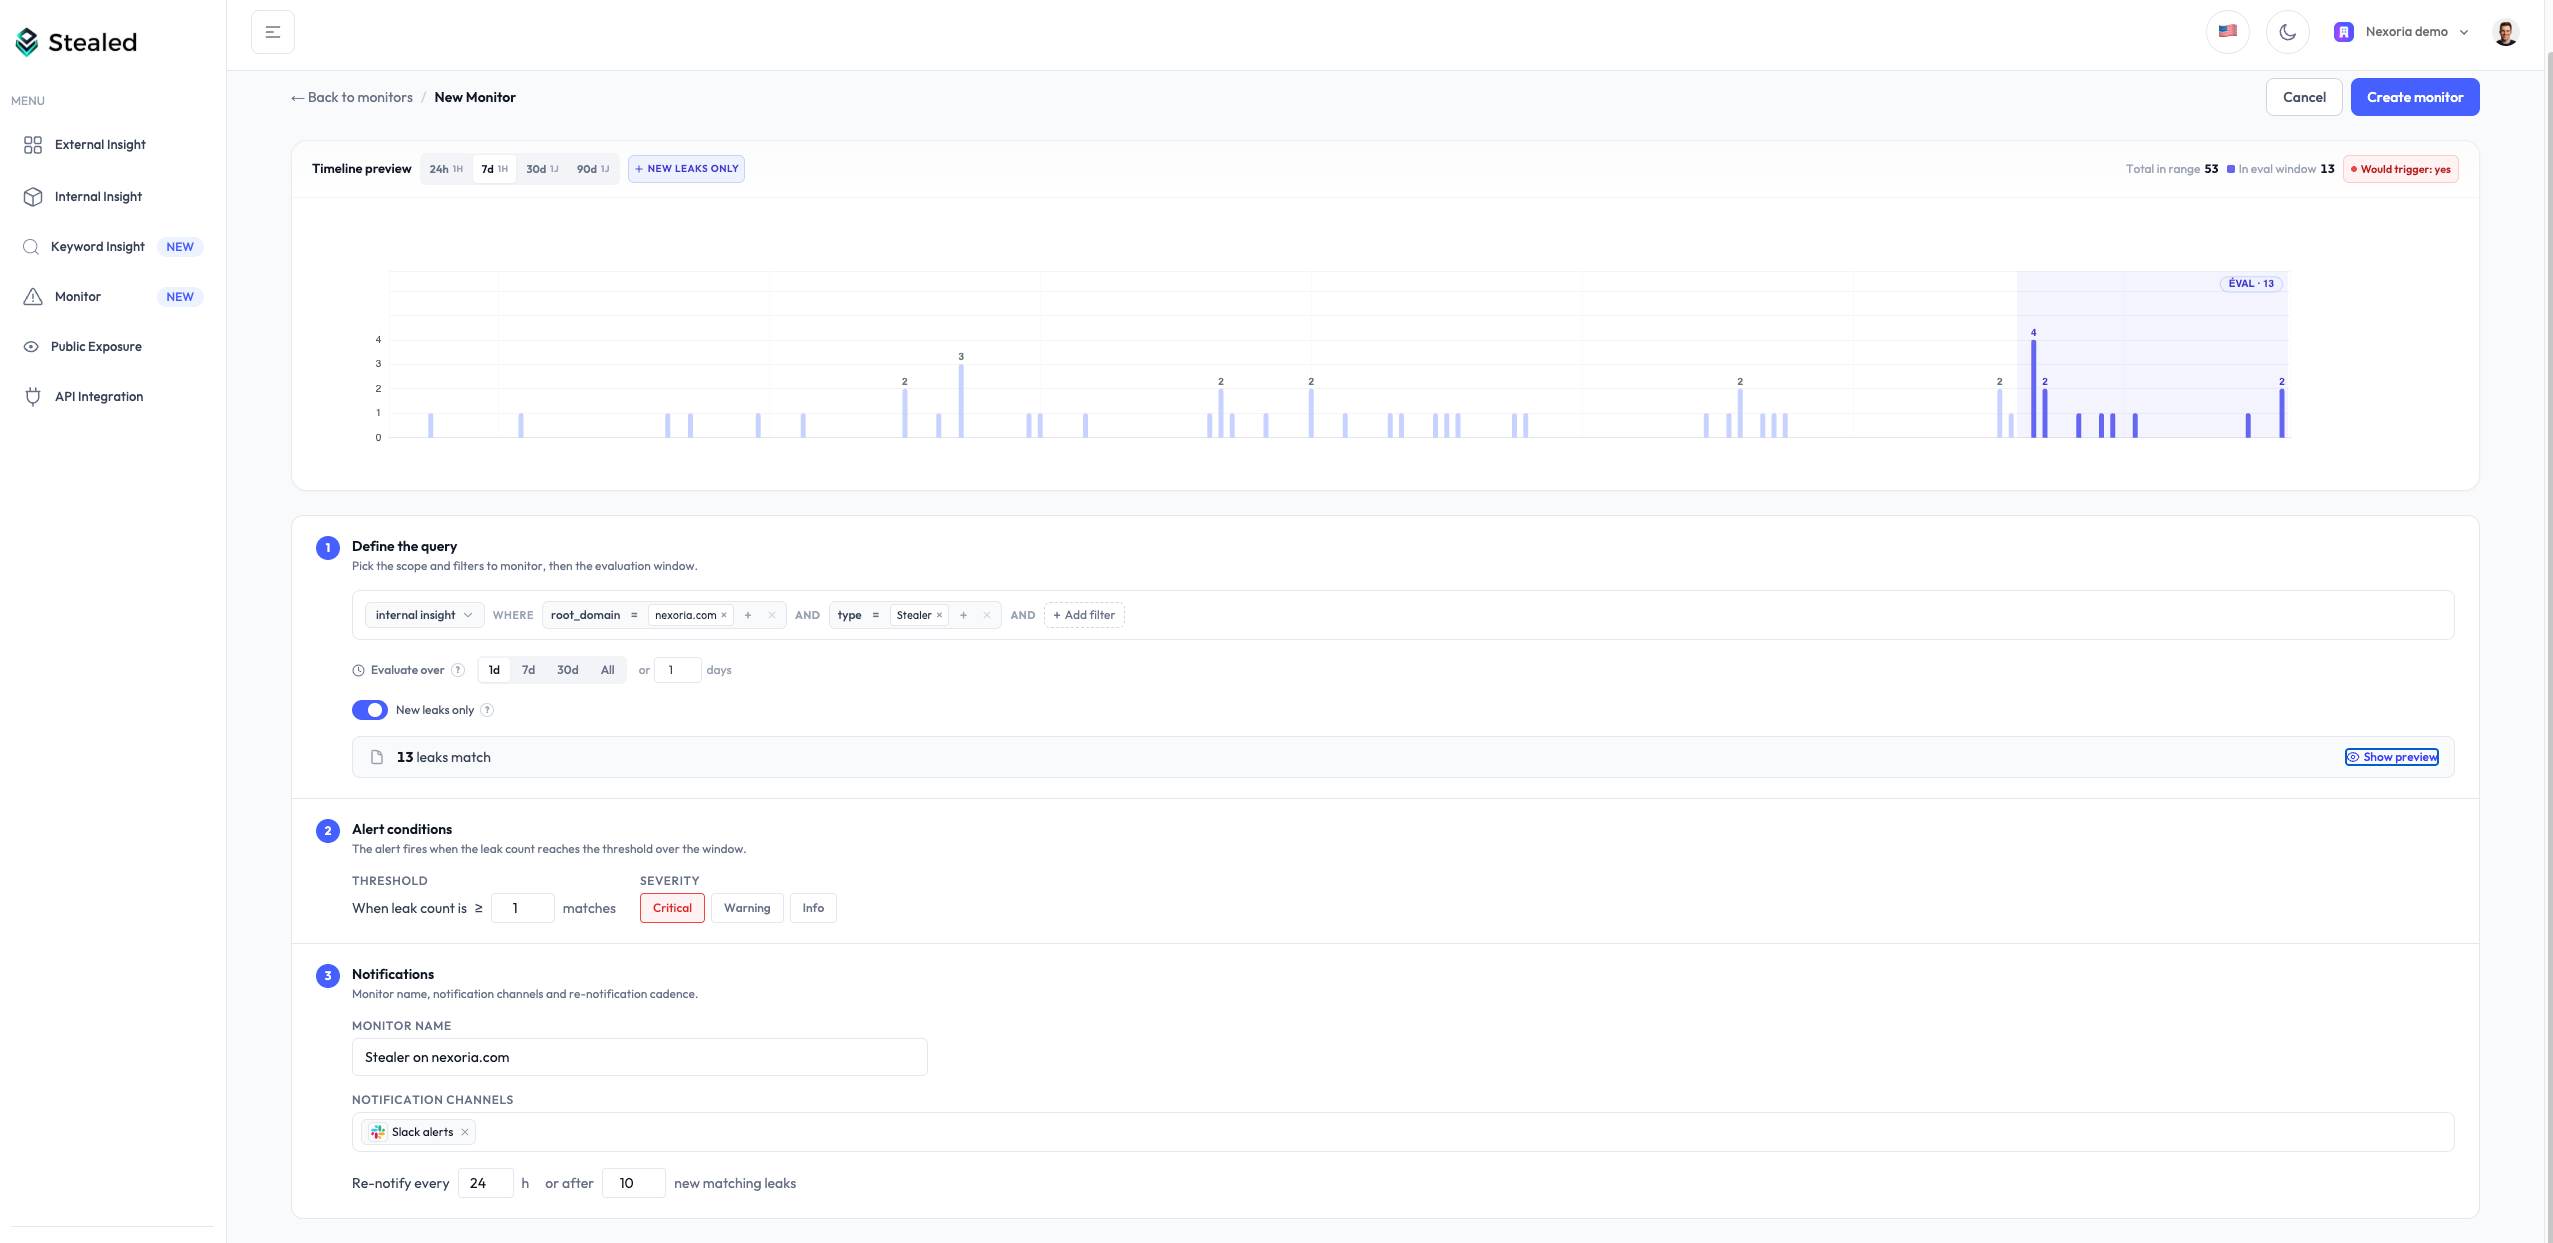
4. Configure your first monitor
A monitor is a rule applied to your live leak feed. When new credentials match the rule, an event fires and notifications are dispatched to your chosen channels.
Open Monitoring → New monitor and configure:
- Filters: root domain, subdomain, keyword, leak type (combo list / infostealer), source
- Trigger threshold: how many matching leaks before the alert fires (default: 1)
- Time-based renotification: reminder cadence if the event stays open (default: 24 h)
- Volume-based renotification: reminder when N new leaks match since the last notification (default: 10)
- Delivery channels: Slack, Microsoft Teams, webhook, email
The full lifecycle of a monitor is documented in Create a monitor.
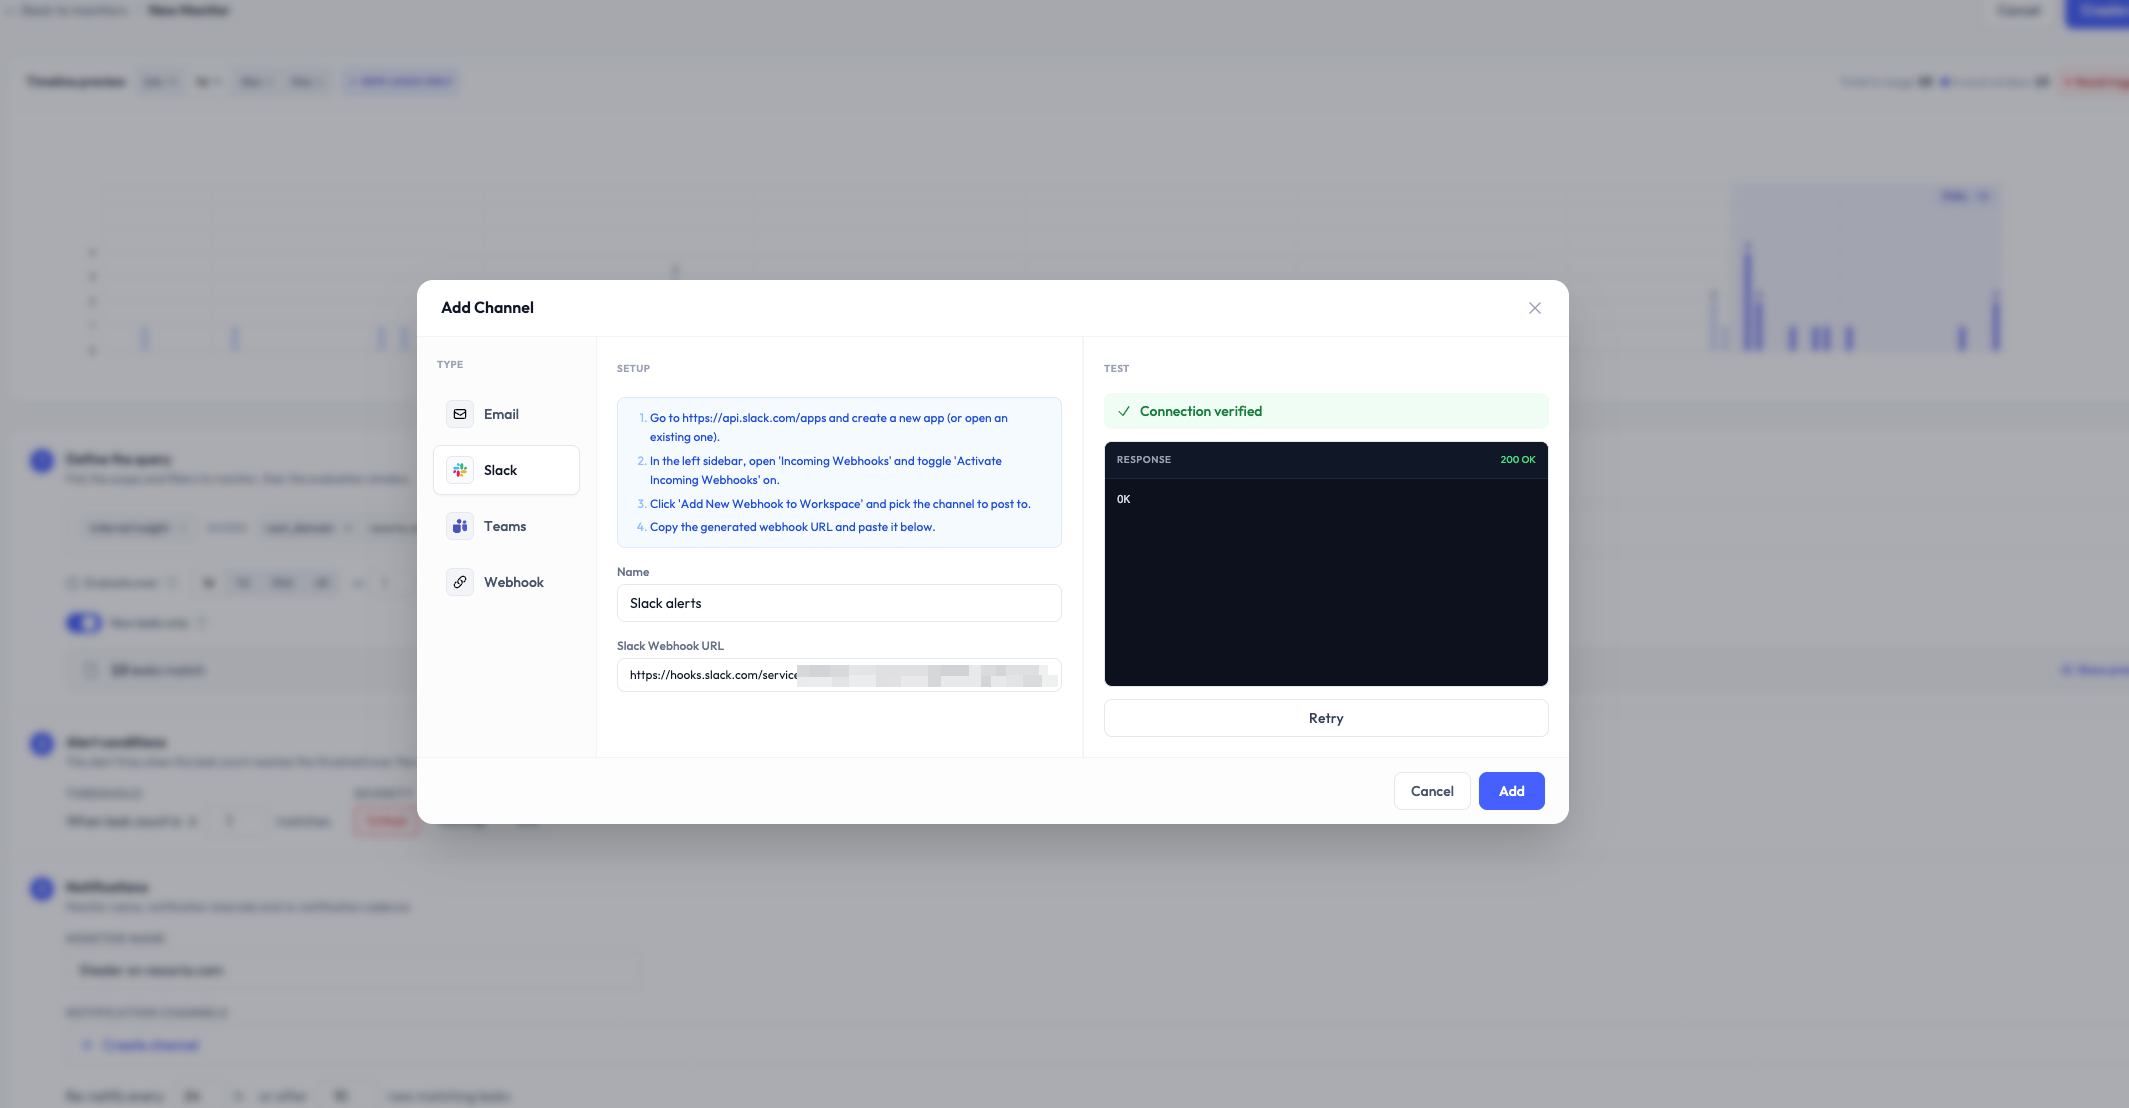
5. Configure a notification channel
Channels are where Stealed sends the alerts. From Monitoring → Channels you can configure:
- Slack: OAuth-installed app, pick a channel
- Microsoft Teams: incoming webhook URL from Teams + workspace
- Custom webhook: any HTTPS endpoint that accepts JSON POST
- Email: comma-separated list of email addresses
Channels are organization-scoped. Once configured, attach them to any monitor. See Receive notifications.
6. Test the flow
The fastest way to confirm your setup works end-to-end:
- Create a monitor with a permissive filter (e.g. all leaks on your root domain) and threshold 1
- Attach a notification channel
- Wait for the next scheduler tick (max 10 minutes) or use the Re-evaluate now button on the monitor page
If your domain has any pre-existing leaks in our dataset, you'll get an event within minutes. If not, leave the monitor running, real leaks will trigger naturally.
You can mute the test monitor or delete it after the validation: mute a monitor or just toggle it off.
What's next
- Surveillance overview: understand the three perspectives Stealed offers on your data
- Create a monitor: full reference for monitor configuration
- Incident handling: assign, comment and produce an audit trail